Print from a MAC
Download the installation file (.ZIP)
- Download the
- Download the
- Download the
Note: If a window pops up with a list of your print jobs, you already have PaperCut installed and can skip to Step 6.
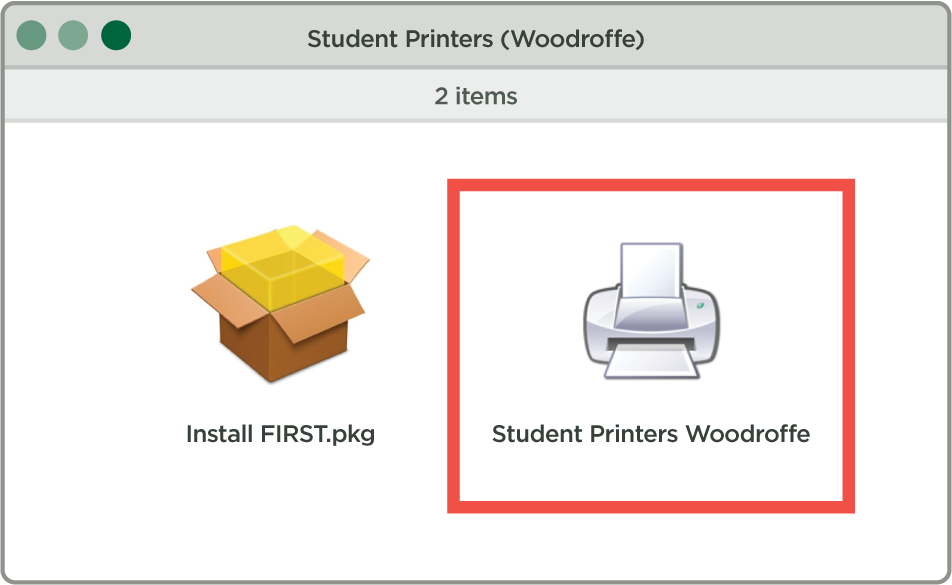
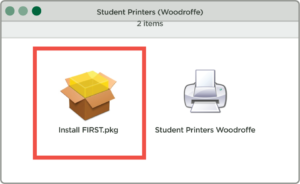
- To install PaperCut, open the Student Printers dmg file and double-click to mount the installer file. Double click on the “Install FIRST.pkg” to begin the driver installation.
- When the installer runs click “Continue” then “Install” and enter in your local computer username and password when prompted.
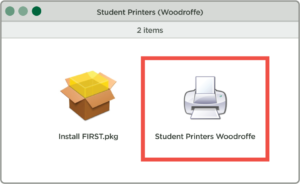
- Refer back to the installer dmg. Now run the second installer to install the printers.
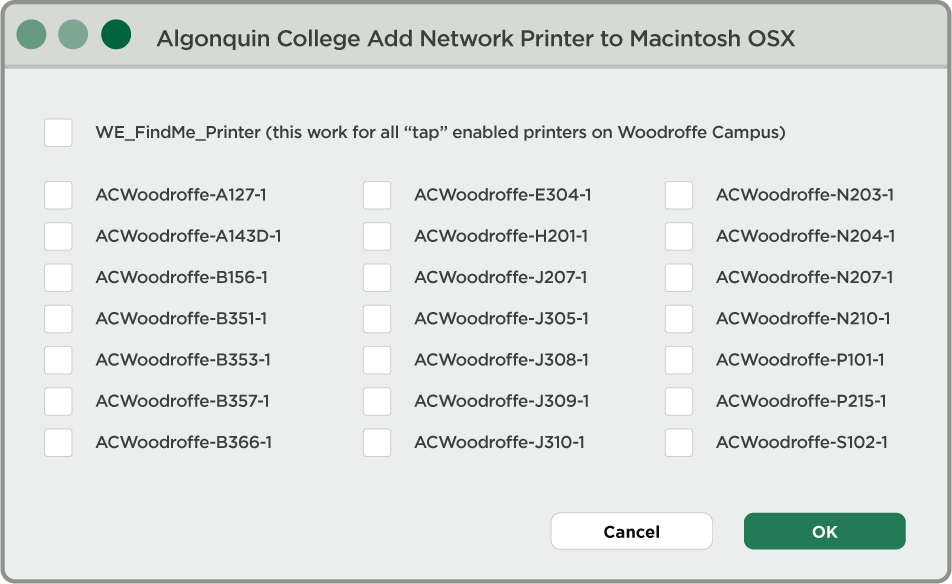
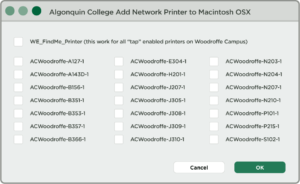
- Enter your local computer username and password for this installer when prompted, then check the printers that you would like to install and press ok. Checking an individual room will install the Direct Print Driver for that room.
- It will also install PaperCut into your applications folder and create a login item so that PaperCut will start each time you login. If PaperCut does not start automatically, you can launch it by double clicking PCClient in the Applications folder.
Note: The PaperCut taskbar icon is not visible when using Dark Mode. - Once PaperCut is launched it will prompt for your network username and password.
- The first time you print a document, make sure you select the correct printer in the print dialog box (Colour, Grayscale, or Lexmark device). You will then be asked to enter woodroffe\network username and password. Once the print has left the printer queue, you can go to the printer and tap your Student or Staff card, or login with your college username and password at the printer to release the print job.