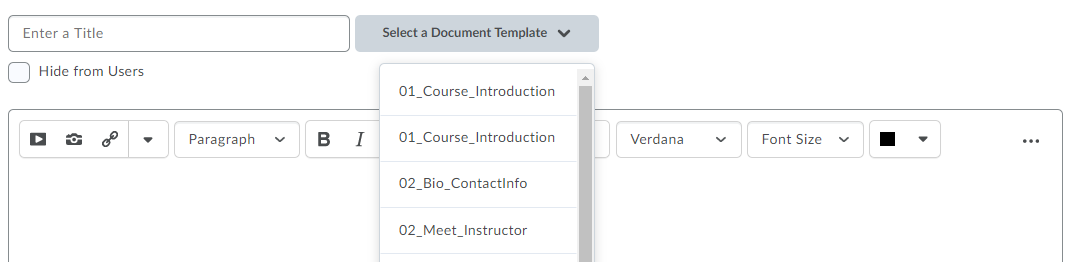
Creating course content using the HTML Editor in Brightspace opens a whole realm of possibility. Luckily, Brightspace makes this easy by providing built-in templates under Create a File > Select a Document Template.
All activities, such as Assignments, Quizzes and Discussions are also HTML enabled.
It’s important to always write HTML code with accessibility in mind! You want to provide your students a good way to navigate and interact with your course. Make your HTML code as semantic as possible. For some suggestions and examples on writing semantic HTML, check out the HTML Accessibility guide by W3Schools.
Brightspace also offers its own tools for easily creating semantic HTML in its HTML Editor, as introduced in the video below. For additional tips on how to use the Brightspace Accessibility Checker, read Improve Your Course with the Accessibility Checker underneath the video.
Baked in Brightspace HTML Editor, the Accessibility Checker makes it easier than ever to improve the accessibility of your content pages. Here are seven simple tips to build more accessible content topics with the help of Accessibility Checker.
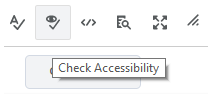
1. Run the Brightspace Accessibility Checker
The Accessibility Checker is available within the HTML Editor when you create or edit HTML content pages. It is located right beside the Spellcheck button. You can select “Check Accessibility” anytime while editing your content.
The Accessibility Checker will catch common accessible issues on static HTML content and offer suggestions to help you fix the issues on the spot. Please note, the Accessibility Checker does not replace real-user testing especially when you have interactive activities that are imported into the course. Real-user testing is still needed for keyboard-only navigation and screen reader testing.
2. Add Proper Image Alternative text
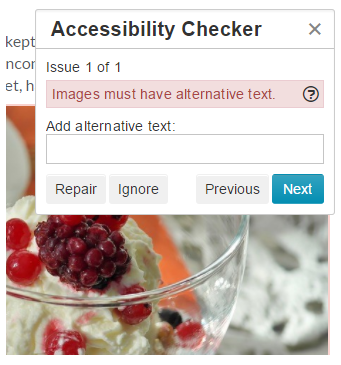
The most common accessibility issue is missing image alternative text (alt text). Alt text is read by a screen reader in place of the image, which allows the learners with visual impairment to access the information. As a requirement of HTML standard, every image must have an alt attribute.
How to enter alt text: While inserting an image within the HTML Editor, you are prompted to enter the alt text which will be automatically embedded into the HTML code (e.g. <img src=”filename.jpg” alt=”ice cream” />).
The Accessibility Checker will display an error message “Images must have alternative text” if the alt text is missing. It will then provide you the opportunity to repair the issue by adding alt text inside the report panel.
3. Use Color Contrast Checker
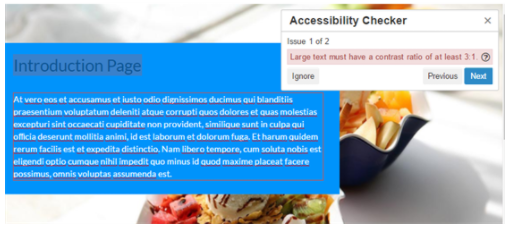
Low color contrast is another common accessibility issue. Web Content Accessibility Guidelines (WCAG) 2.0 Level AA requires a contrast ratio of 4.5:1 for normal text and 3:1 for large text.
How to check color contrast: Most of you already know there is a built-in color checker within the Brightspace HTML Editor. As you select a font color for your text, the color Contrast Ratio is calculated and indicates whether it conforms to the WCAG 2.0.
Based on the same principle, the Accessibility Checker can catch the following issues:
- Large text must have a contrast ratio of at least 3:1.
- Visual presentation must have a contrast ratio of at least 4.5:1.
Tips: To adjust the color contrast, you can use the WebAIM: Color Contrast Checker to lighten or darken options to modify the colors slightly.
4. Use Headings Correctly
Headings allow learners with visual impairment to understand the logical structure of the page and navigate to or skip over sections. But if the page headings are only made of bold text or large font size, the screen reader cannot make sense of the hierarchy or help the users quickly go to the section they wanted.
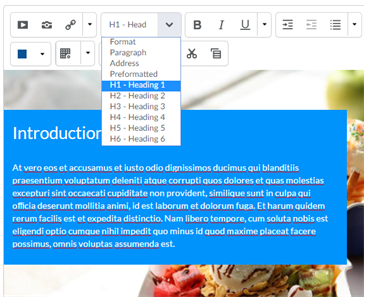
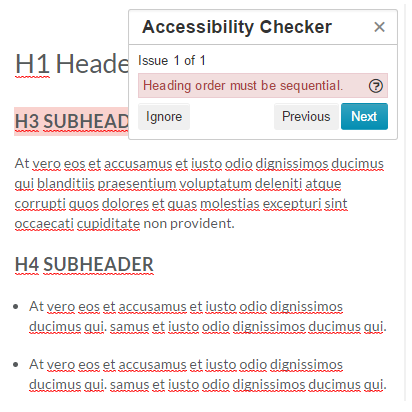
Every page should have an H1 heading (usually the page title), then H2 Heading as the major section headings, down to H3, H4 etc. The headings also need to be used in the correct order.
How to use headings correctly: Select the text then set it to the proper heading use the Format dropdown menu. Please Do NOT skip a level.
If the heading levels are not in order, the Accessibility Checker will report Heading order must be sequential.
5. Use Lists Appropriately
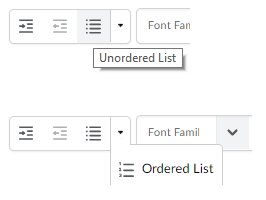
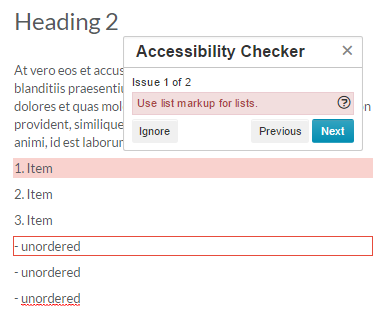
Lists convey a hierarchical content structure to screen reader users. Unordered list <ul> should be used when list items can be arranged randomly, while ordered list <ol> should be used when a sequential order is important.
How to use lists: Select the items, then choose the Unordered List icon if the order doesn’t matter or select Ordered List from the dropdown menu if it is sequential.
The Accessibility Checker will suggest to Use list markup for lists if the lists were not true list.
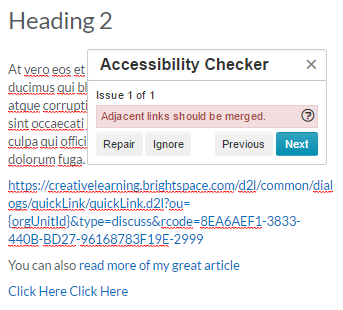
6. Create Descriptive Hyperlink Text
Making hyperlinks accessible is one of the most important aspects of web accessibility.
How to use hyperlinks: Select Insert Quicklink icon, then select URL in the popup window, enter the URL and the Title that describes the link’s destination.
Best practices:
- Create unique and descriptive hyperlink text
- Avoid using the URL as hyperlink text
- Avoid phrases such as “click here,” “more,” “click for details”
- Avoid providing two links right next to each other that point to the same location (it can be confusing for screen reader users). Try combining the links when possible.
7. Markup Tables Appropriately
A table contains columns or rows that show the meaning of the data in the grid. Sighted user can quickly make visual association between the data and the row/column headers, however the users who cannot see the table cannot make the visual associations, they rely on the screen reader to navigate through the cells one at a time, and hear the column/row headers if the table is marked up properly. For detailed explanation, please refer to the article WebAIM – Creating Accessible Tables.
How to mark up tables: Select the cells to be marked up as a table header, select Table Cell Properties then chose Cell Type as Column Header or Row Header.

Here are some common errors can be caught by the Accessibility checker:
- Tables must have captions.
How to fix: set a brief descriptive text to indicate the content of the table. This will add <caption> to within the <table> element.
- Tables must have at least one header.
How to fix: Set table header to “Header Row” or “Header Column”, which will change the data cells <td> to header cells <th>.
- Table headers must be associated with cells.
How to fix: Set header scope to “Row” or “Column” for simple table header, which will add scope attribute (<th scope=”row”> or <th scope=”col”) to associate header cells and data cells.