Sharing Presentations
Sharing outside of Brightspace
Whether you plan to share your presentations within or outside of Brightspace, there are some settings to pay attention to within the My Mediasite portal first. The first guide below takes you through those settings, before moving on to generating links and sending invites.
- Sharing Presentations – an Algonquin College text and screenshot guide to sharing presentations using links, emails or embed codes.
- Sharing your Presentation using Channels – another Algonquin College guide showing how to use channels and change security settings to share a series of videos. This is useful if looking to add annotations as an interactive element later.
- Sharing your Mediasite Presentations – MediasiteU course on how to share presentations with individuals or via channels.
Sharing within Brightspace
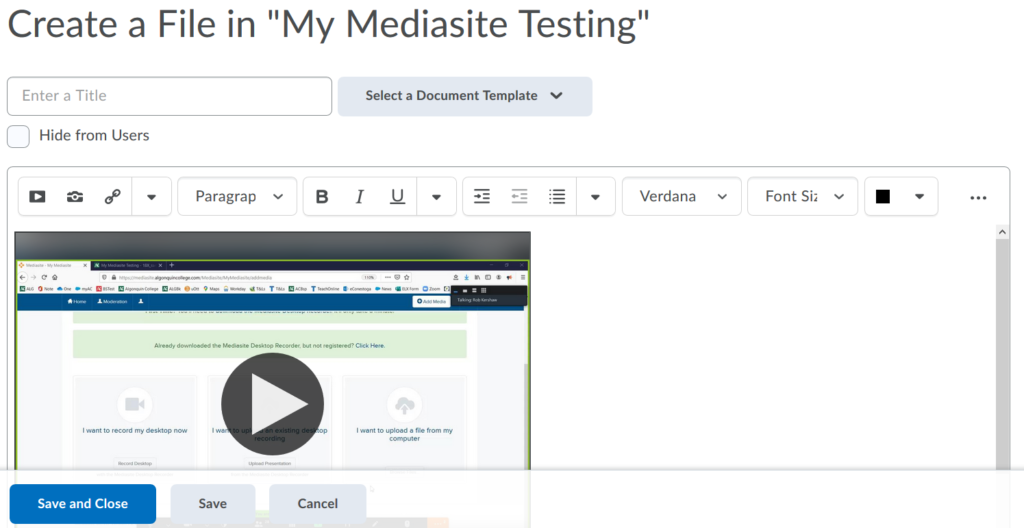
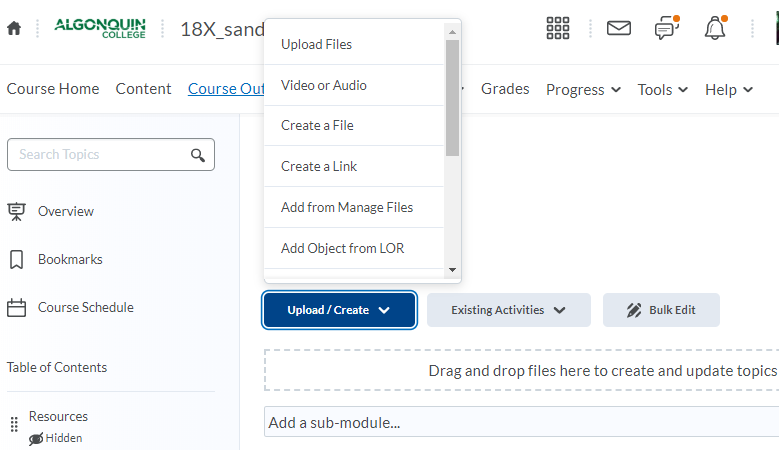
- In Brightspace under Content, click on the Upload/Create button. Click Create a File.
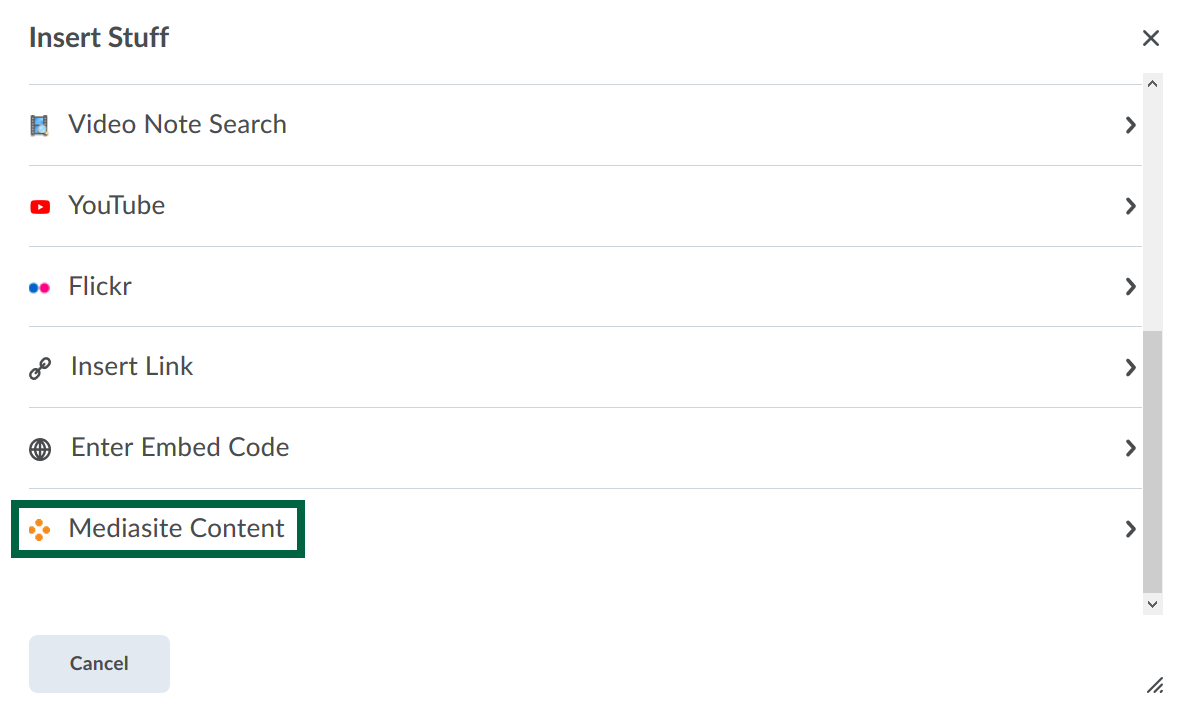
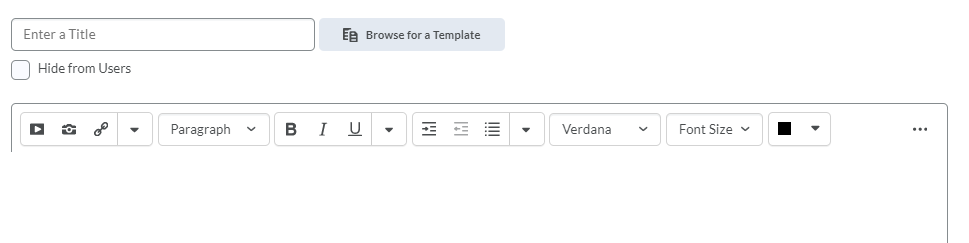
- Click the icon that looks like a “play” button. This is the Insert Stuff menu.
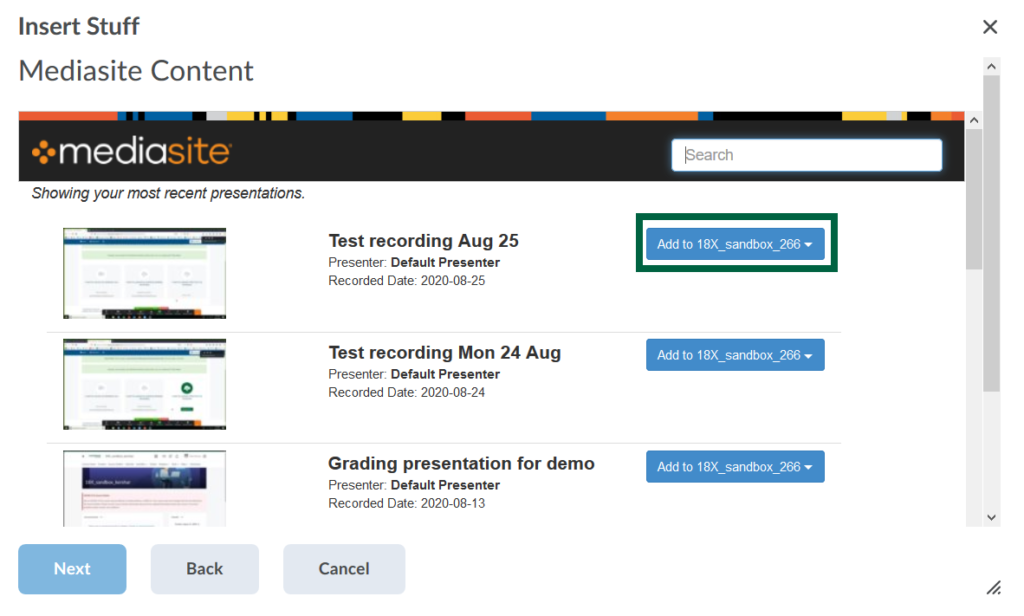
- Click the Mediasite Content option.

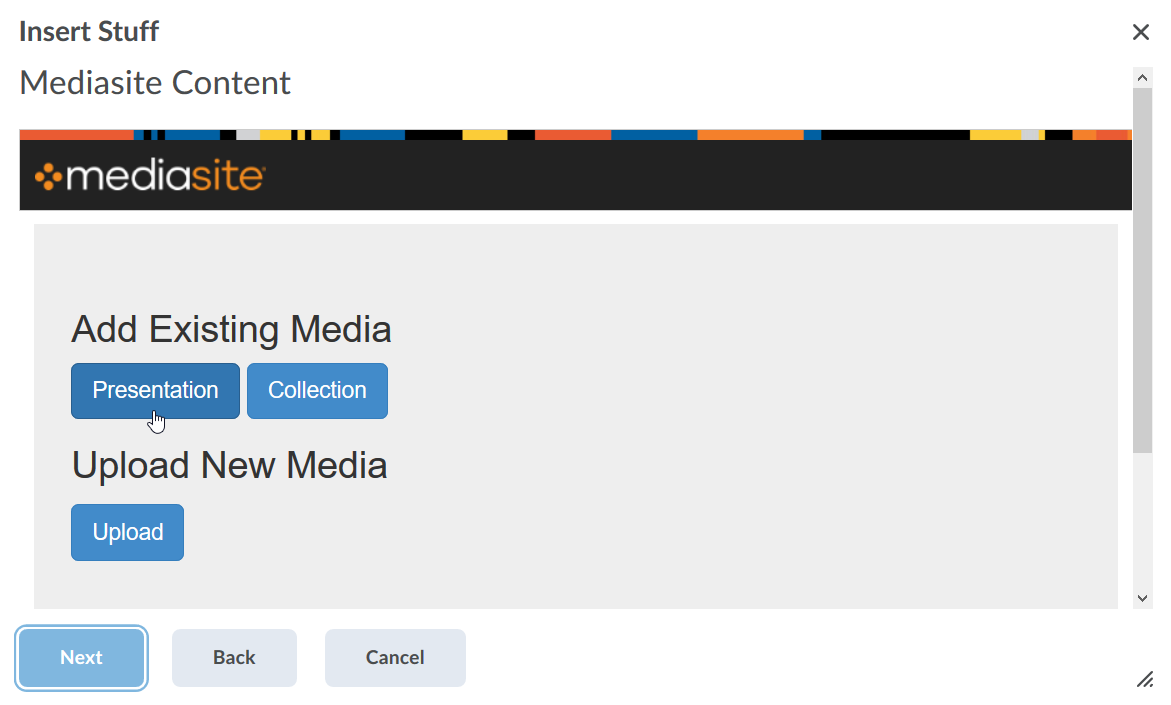
- Click on Presentation under Add Existing Media

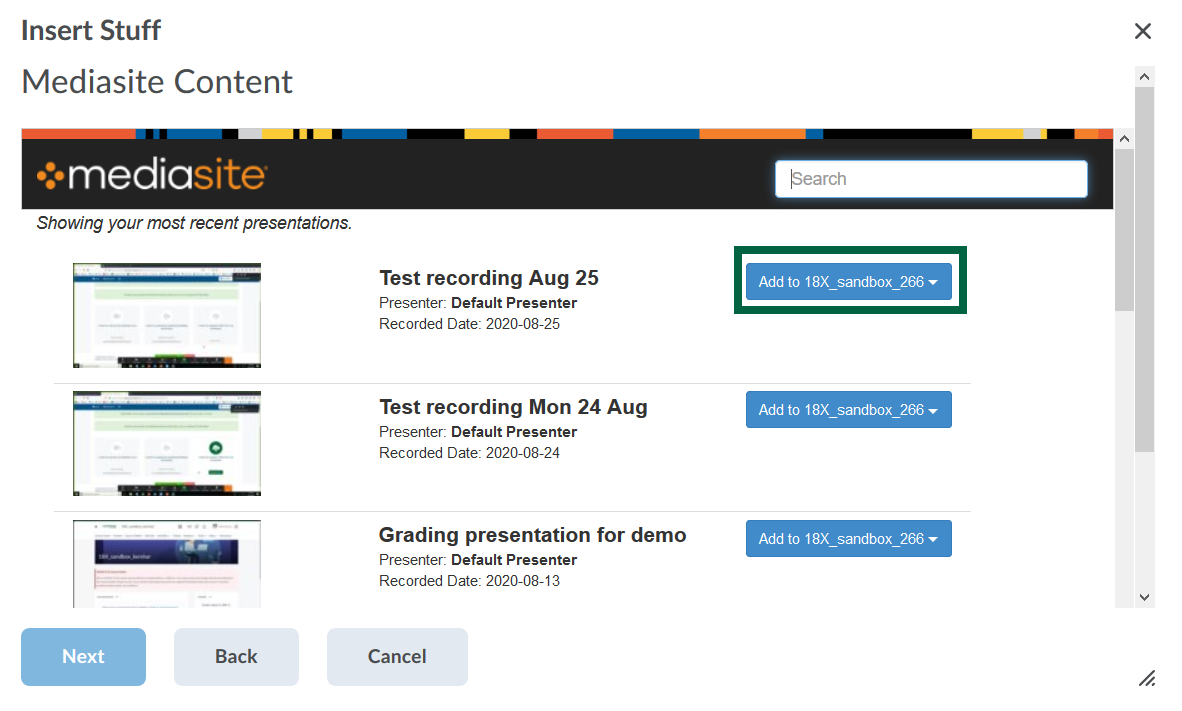
- Click on the blue Add to Course button next to the applicable presentation, and choose from the four options available (if in doubt, select Player Only).
- Check the preview, and click Insert to proceed.

- Add a title to the page, and click Save and Close to complete the file.